GSW Waterslide Decals - Vintage Posters
GSW Waterslide Decals - Vintage Posters
Couldn't load pickup availability
In stock
Waterslide Decals
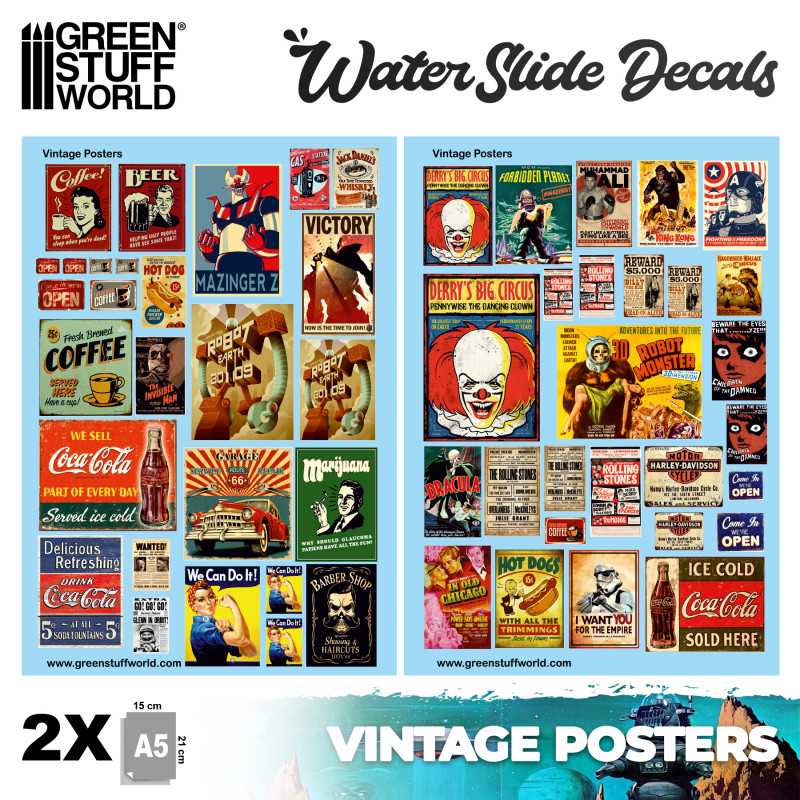
This kit includes 2 sheets of highly detailed, full-color opaque waterslide decals. Decals are applied with water, no solvents are required. You can also use Decal Softener and Decal Fixer solutions to enhance and protect the finish on uneven or rough surfaces.
Each waterslide decal sheet contains a large selection of graffiti in different sizes and shapes, giving you the opportunity to customize your battlefield, buildings, and dioramas.
Approximate Scale: 28-32-54mm (1/58-1/54-1/32)
Sheet: 2 per pack
Size: 148 x 210mm (A5)
BASIC INSTRUCTIONS
1.- Cut out the decal as close as possible to the edge of the image. For better results, use a new blade in the cutter.
2.- Pick up the decal with the tweezers and leave the decal in water for about 20 seconds. Warm water can help with the process.
3.- Use a brush to gently push the decal off the sheet and onto the model. That's it!
ADVANCED INSTRUCTIONS
4.- Before applying it to the model, after the decal has been in water long enough, apply a little Decal Fixer to the surface where you plan to place the decal. Decal Fixer protects the paint underneath and evens out the surface, helping to prevent silvering. Use a brush to gently push the decal off the sheet and onto the model. If it is difficult to move the decal around, you can add a little more Decal Fixer or water to help the decal float on the surface until it is positioned correctly.
5.- If the surface where you want to apply the flat decal is curved, such as on a shoulder guard, the decal may become wrinkled. To avoid this, after the decal is in place, apply Decal Softener. Let the softener react and it will help remove the wrinkles by adapting to the curved surface underneath. Repeat this step 2-3 times until the wrinkles are removed.
Remove excess liquid with a cotton swab to remove any liquid trapped between the decal and the surface. Roll the cotton swab over the decal so that it does not lift from the surface. You can also use a paper towel to press down on the decal in a rolling motion to remove excess liquid. When using Decal Softener, relief scoring will not be necessary to remove wrinkles in the decal.
6.- Finally, apply Decal Fixer again to the decal and model where you have worked to smooth out the surface. Treat as normal with matte or glossy varnish if you feel it is necessary to remove or add a glossy finish.